Daniel Ye

Hey there! Thanks for visiting my online portfolio! I'm Daniel, a Mechatronics student studying at the University of Waterloo. I enjoy learning and applying different technologies to create projects that can help tackle real-world issues.
Projects
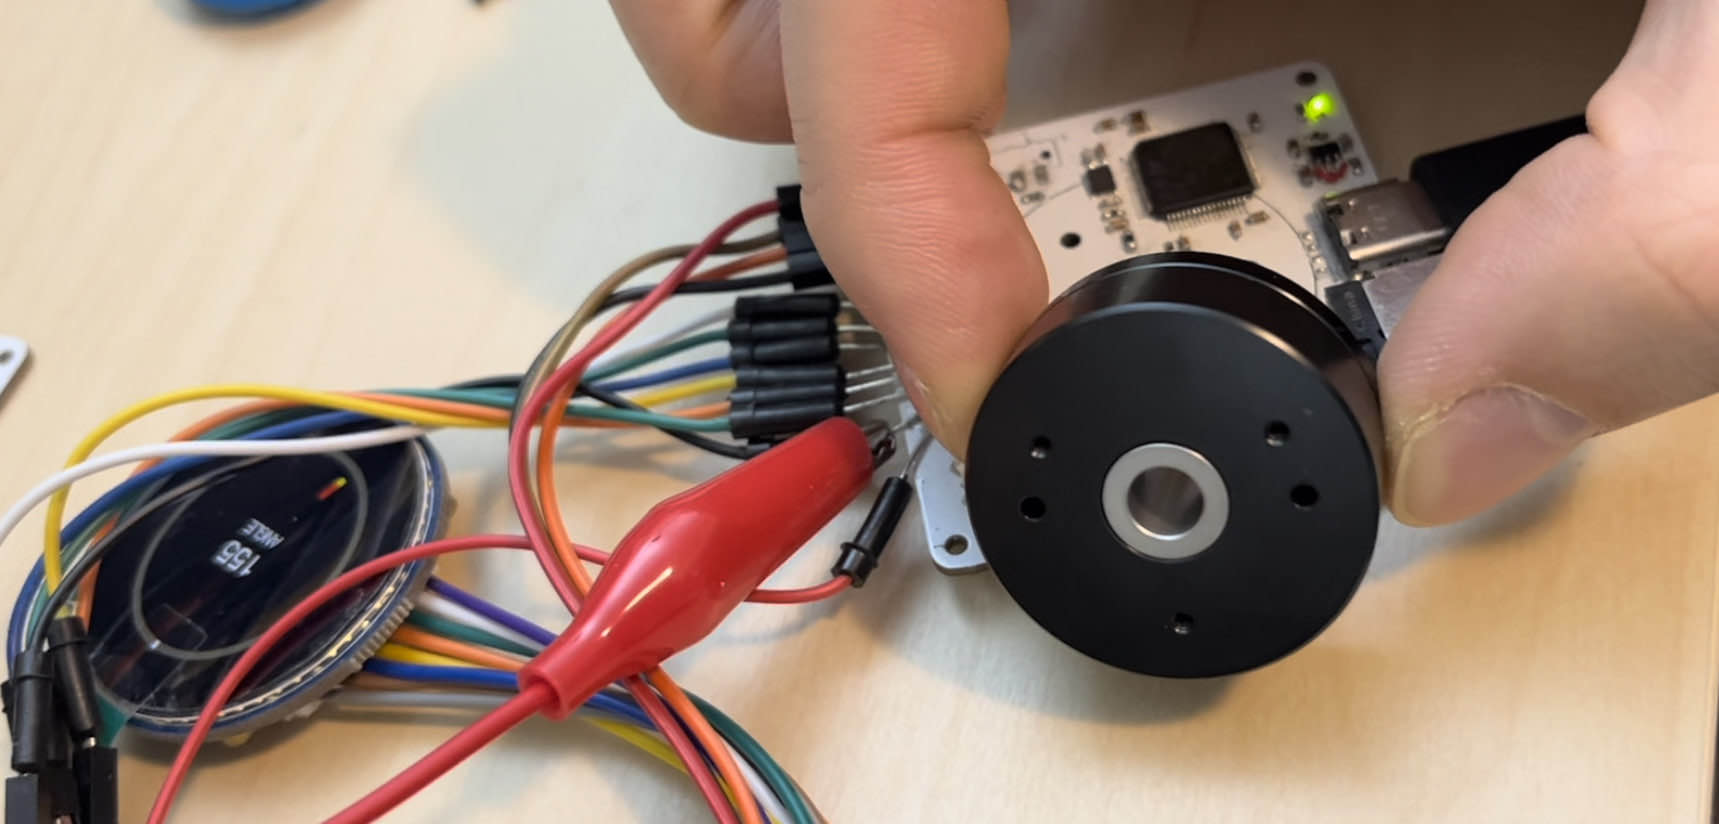
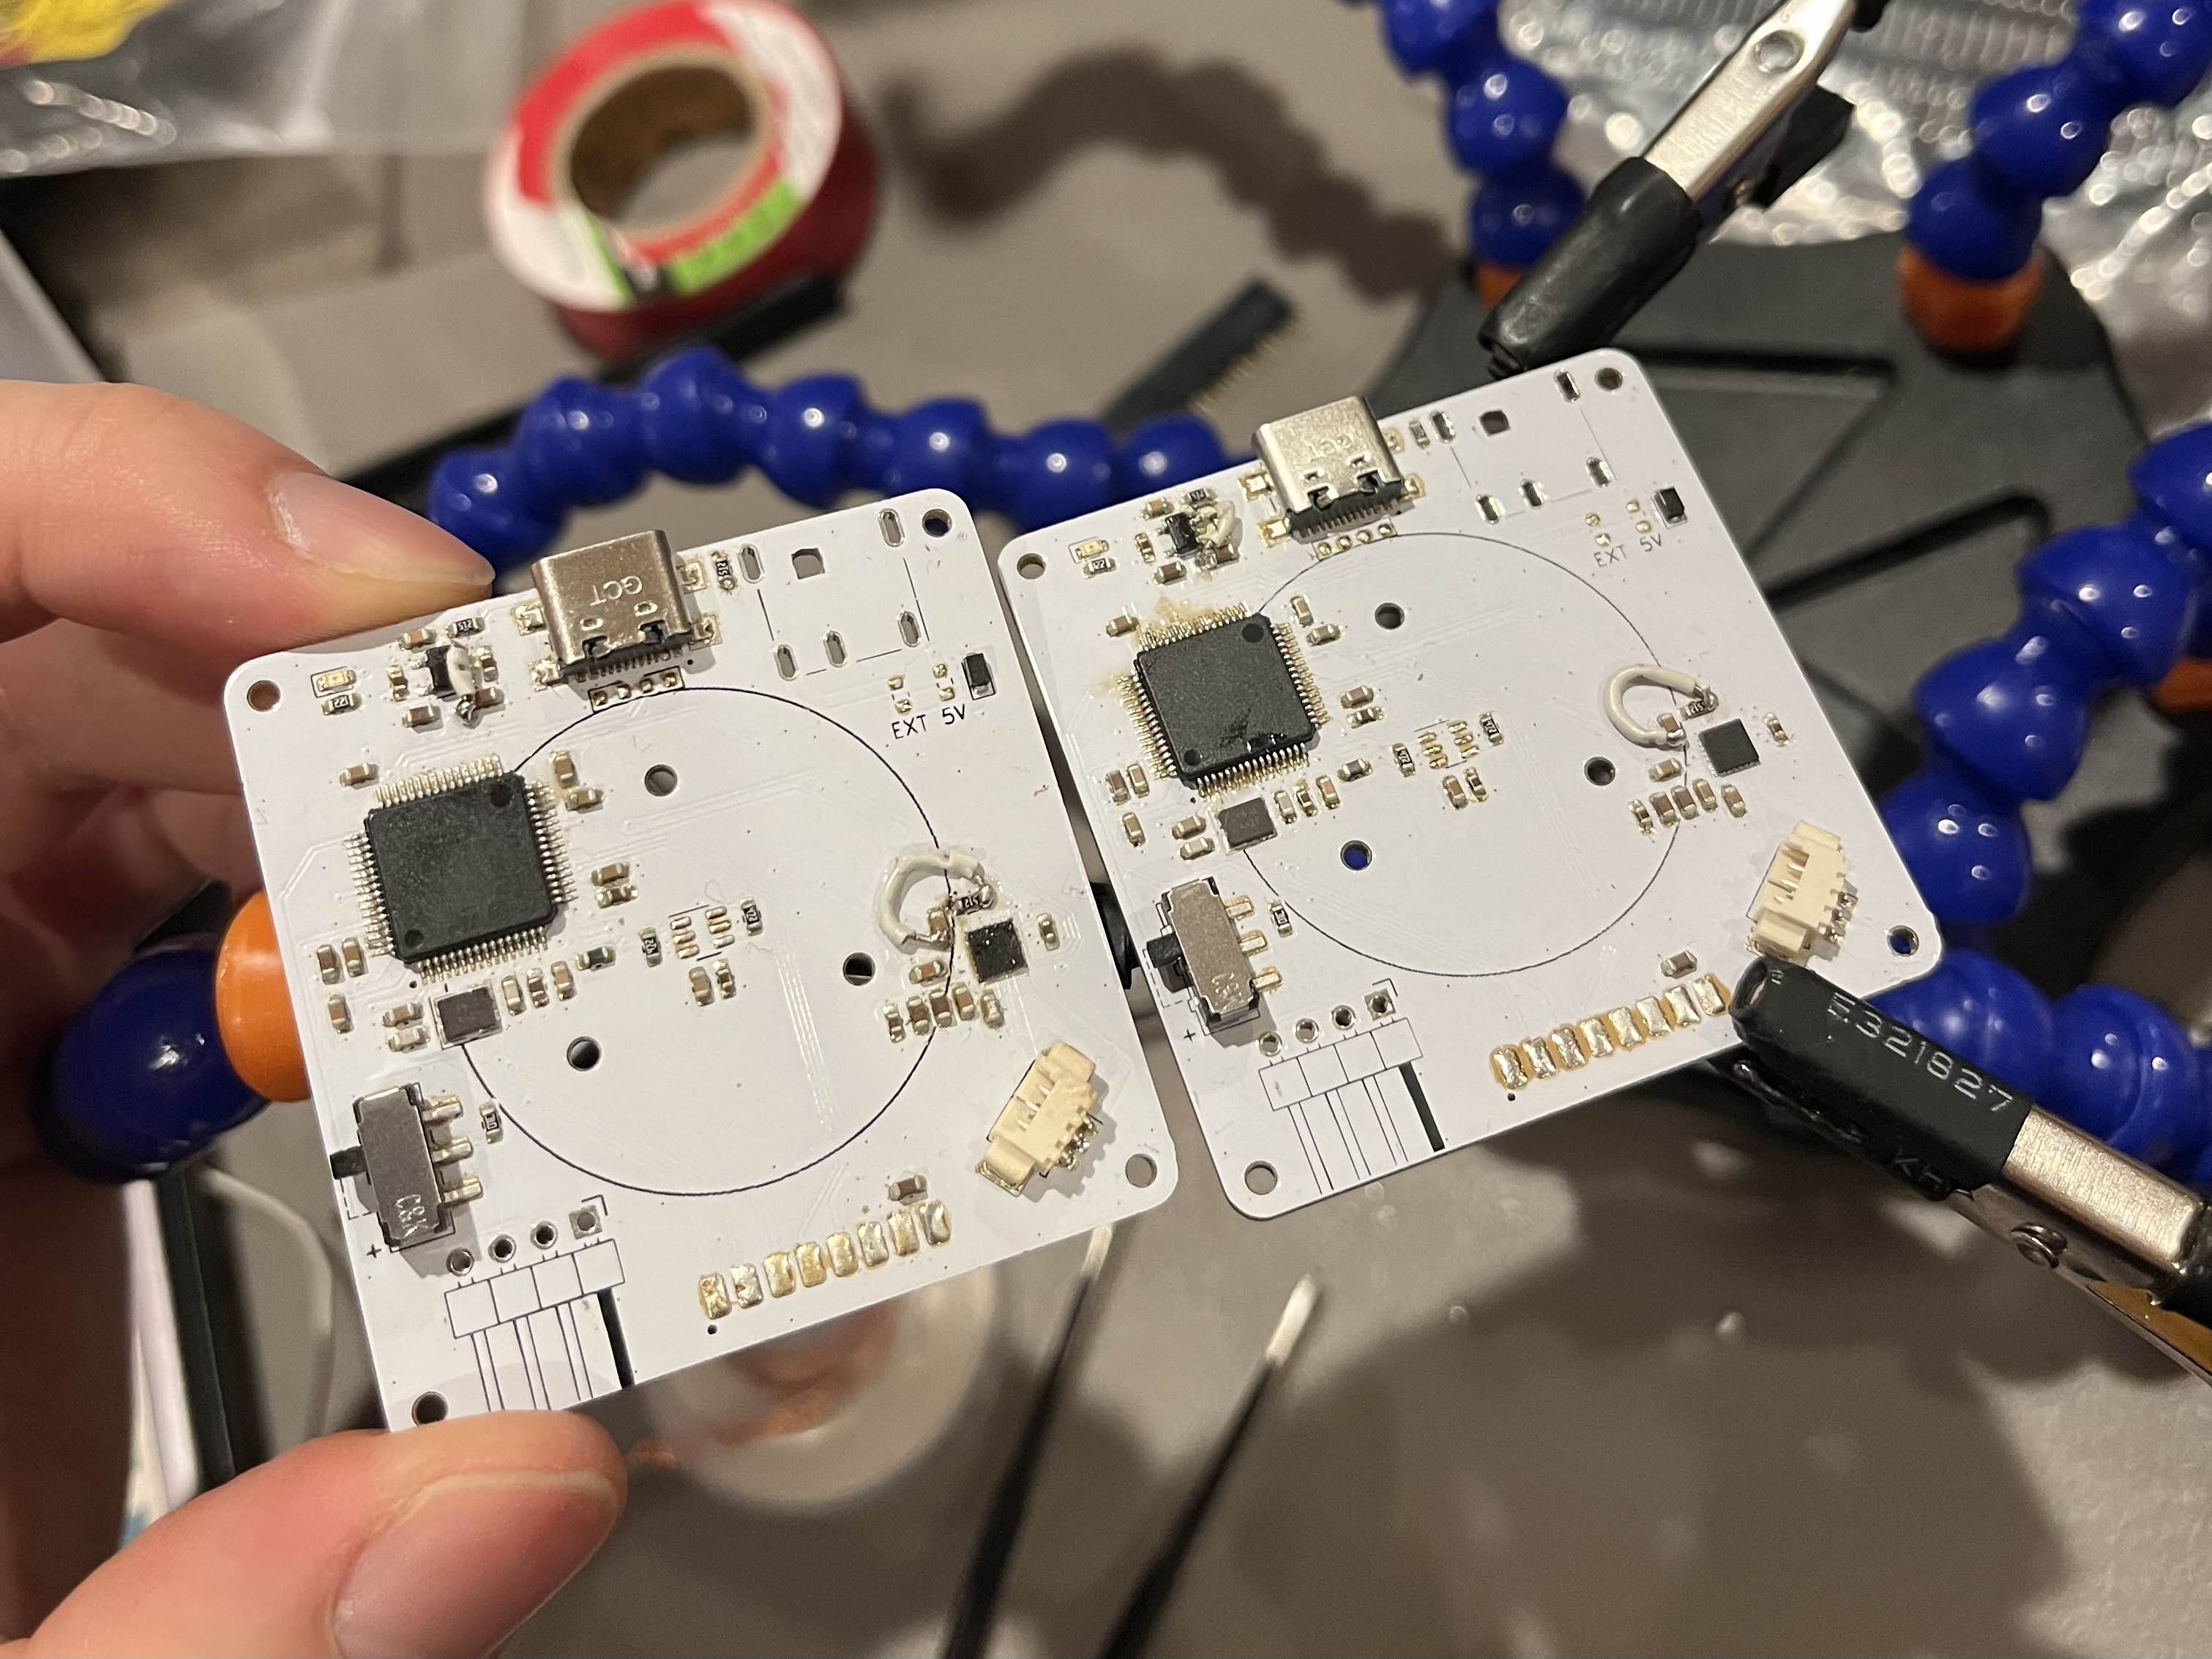
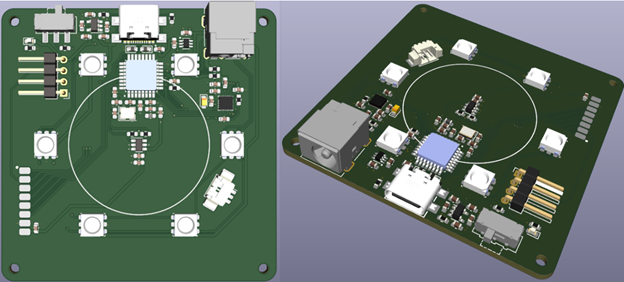
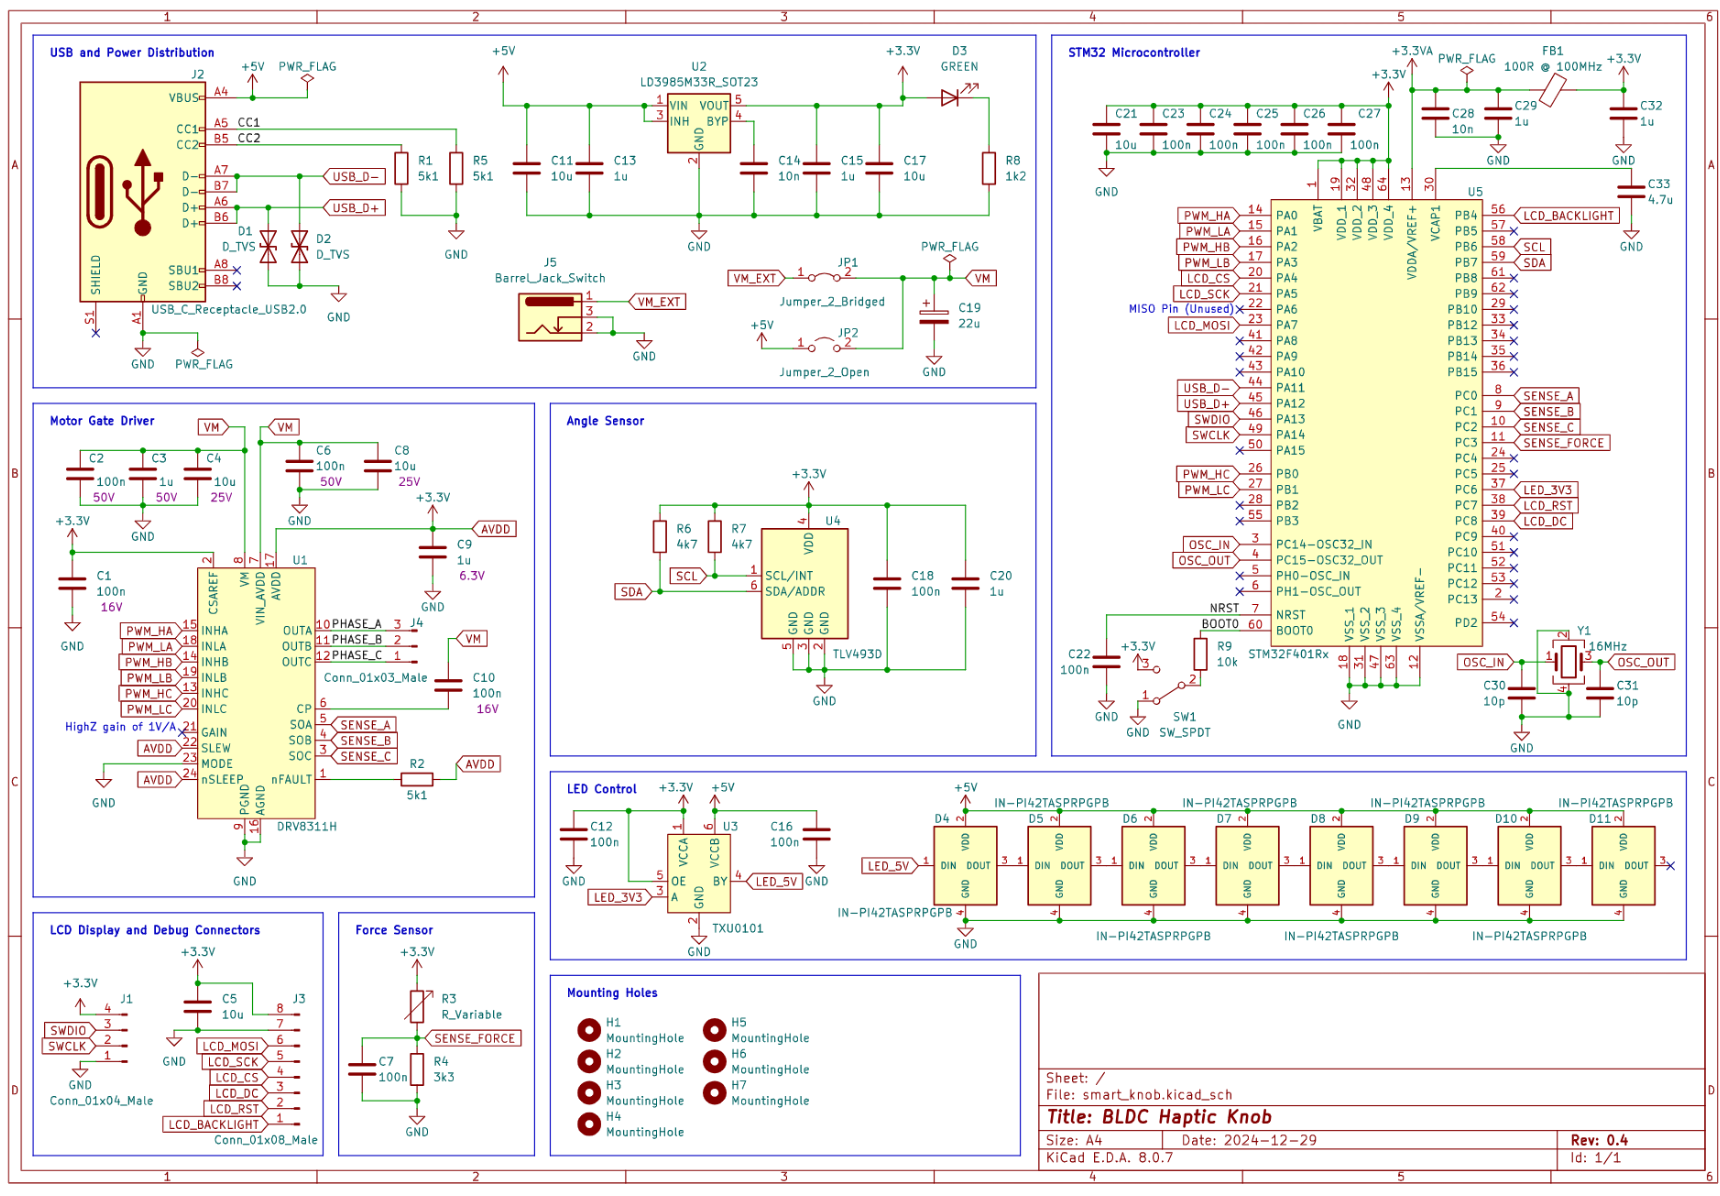
Haptic Knob
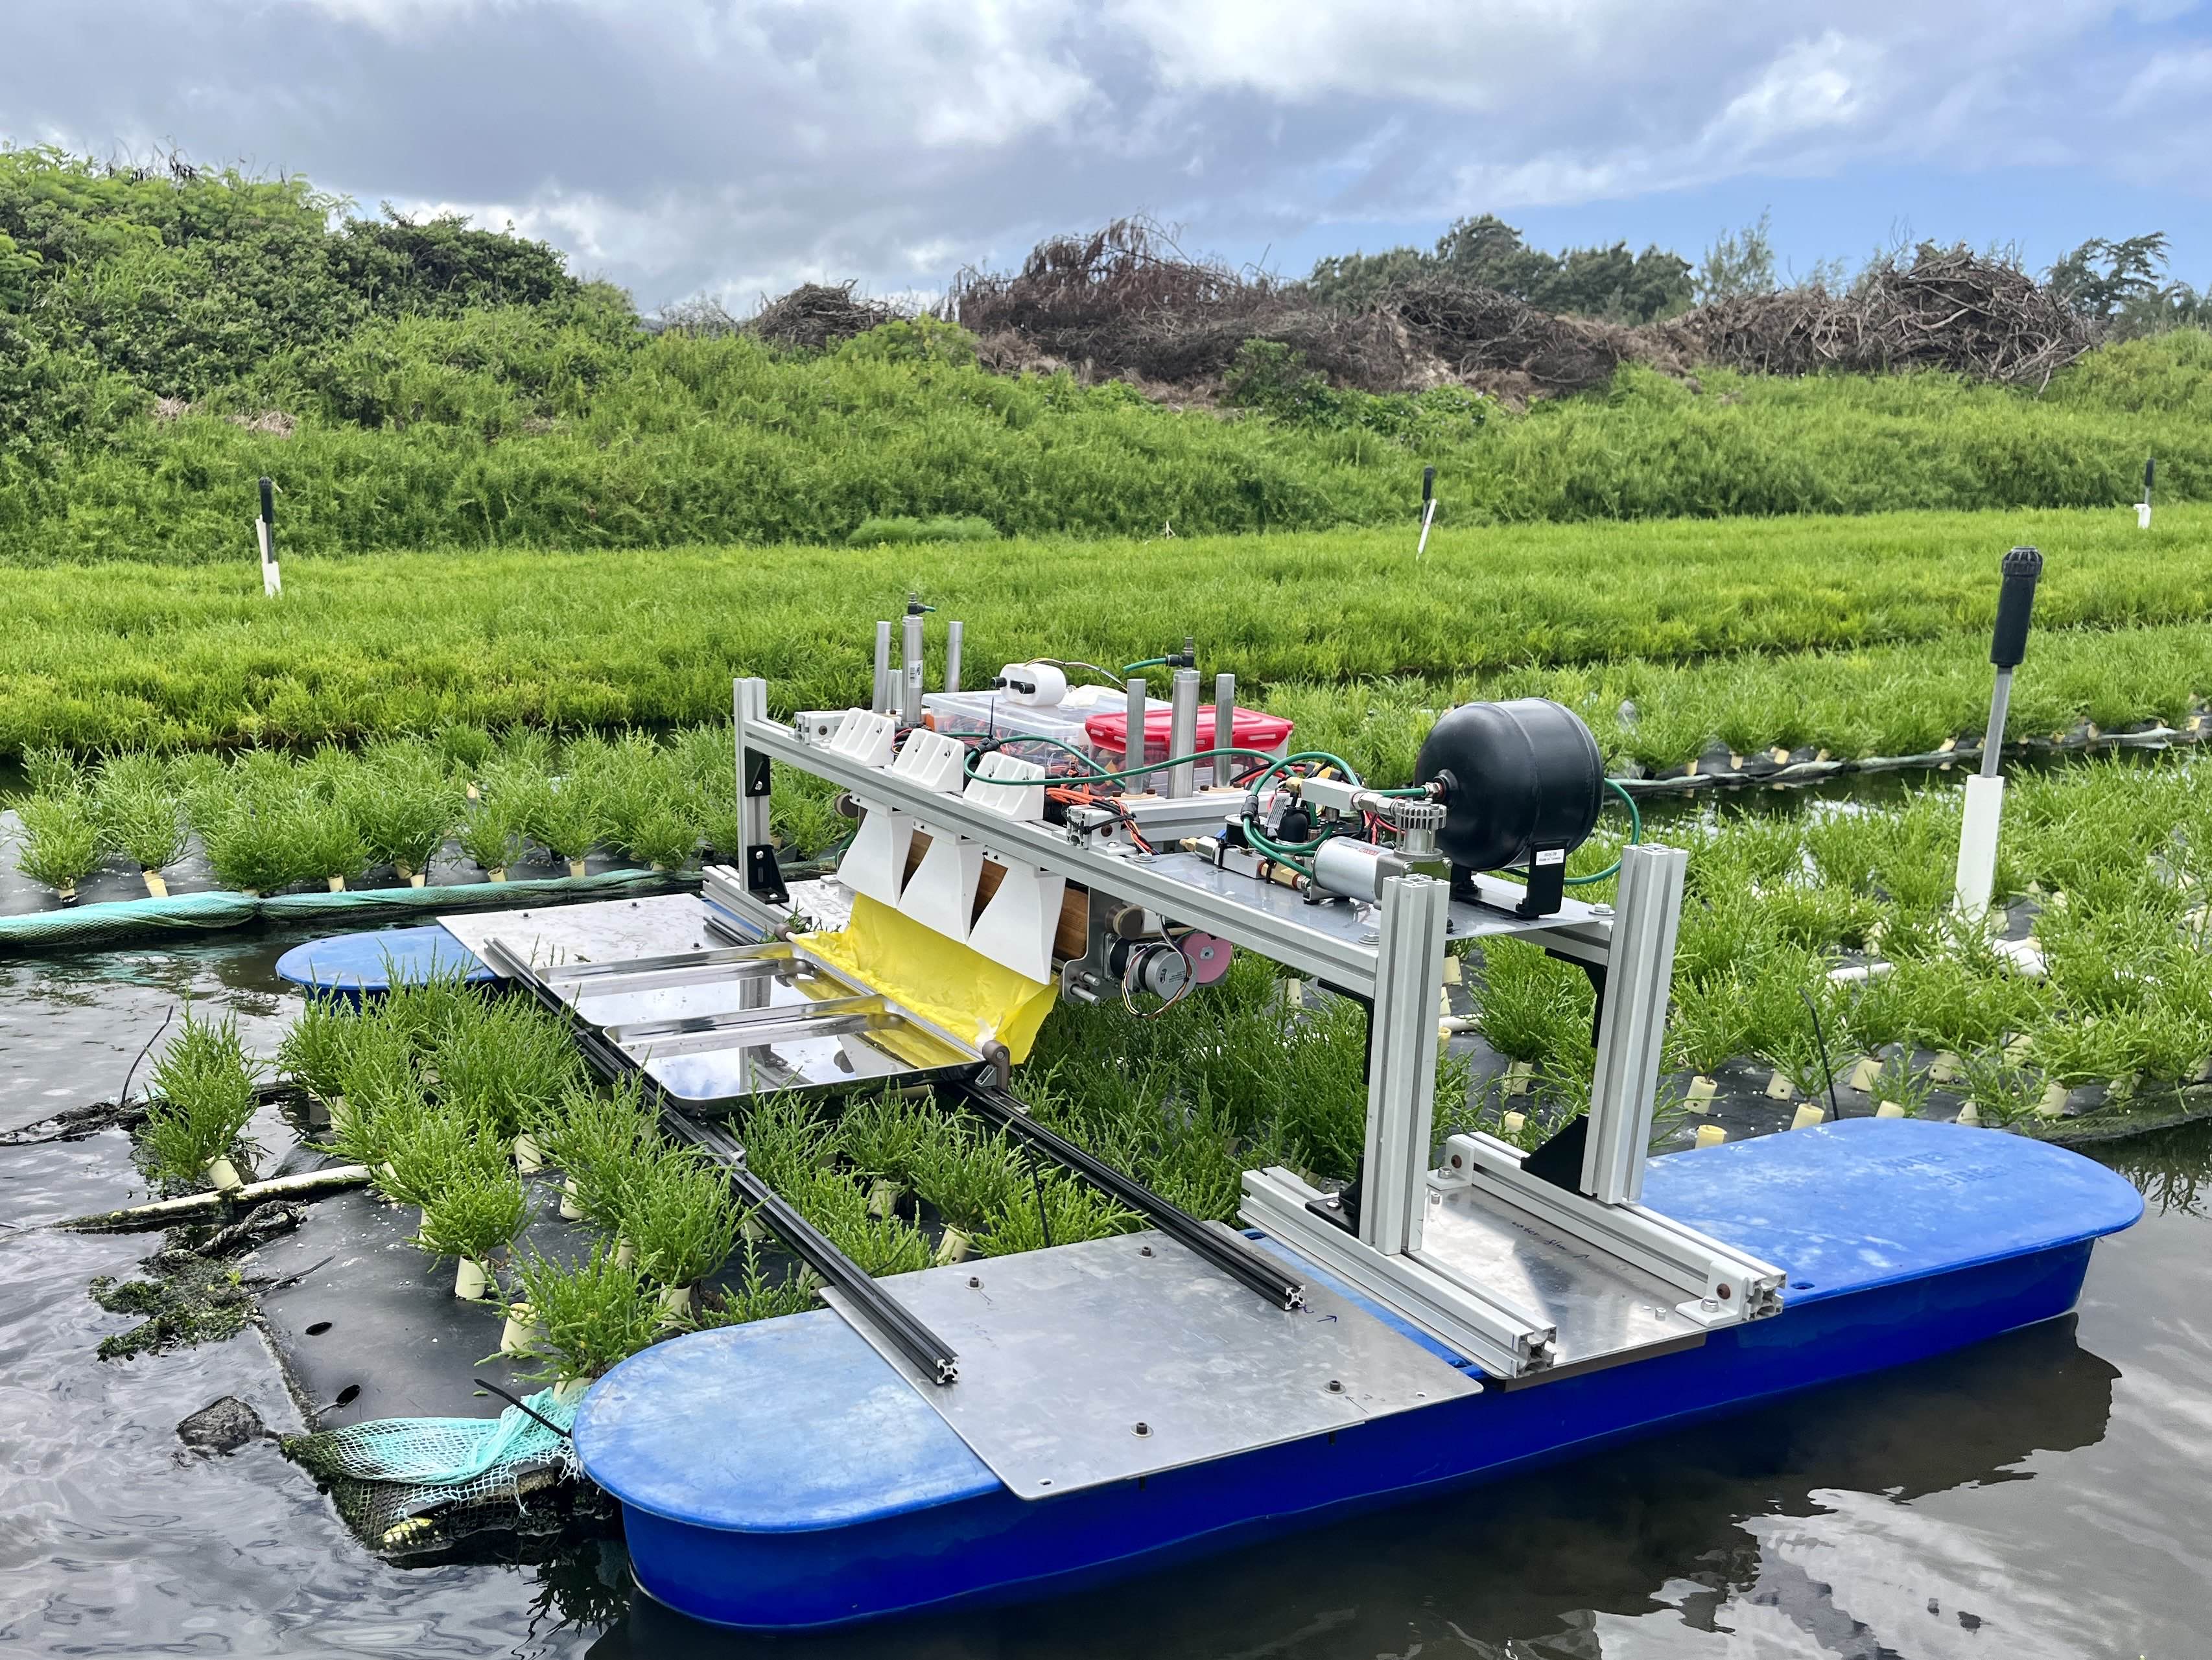
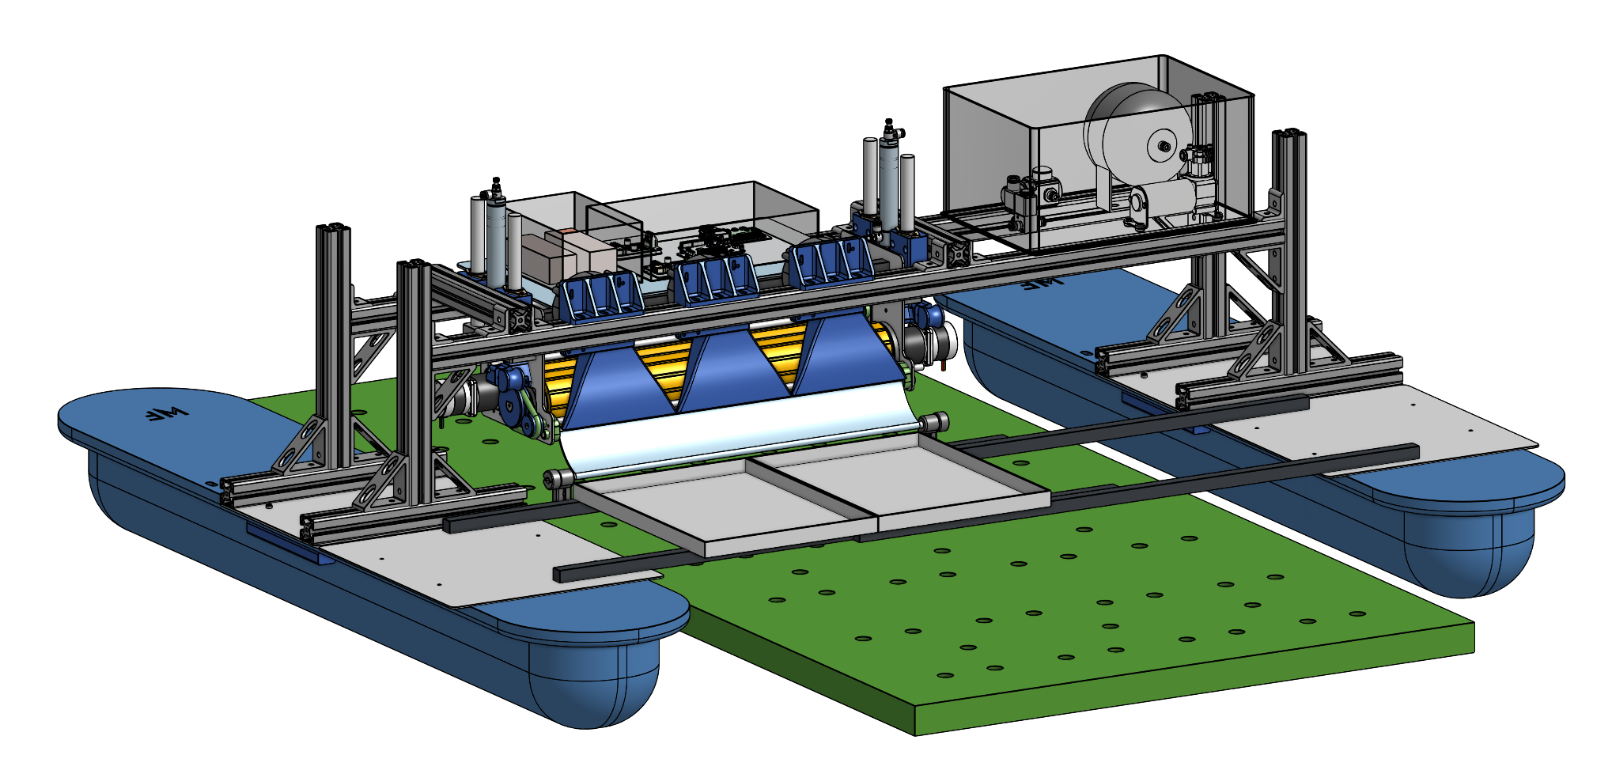
The Salico Harvester Robot aims to reduce human effort in the harvesting of sea asparagus grown on sea water, making the process more efficient and enabling the capabilities for automation.
Using opposing spinning rollers lowered onto the plants by pneumatic pistons, the harvester is able to grip the plants and pick off only the newgrown tips that are suitable for harvesting.
Team Salico was formed by 5 Waterloo engineering students: Max, Joyce, Kevin, Daniel Y, and Daniel Q, as part of our 4th year Capstone design project. The project was made in collaboration with Dr. Wenhao Sun from Olakai Hawaii, to develop automation for Olakai's sea asparagus farms.
Salico Harvester Robot
C, RTOS, Motor Controls, Sensing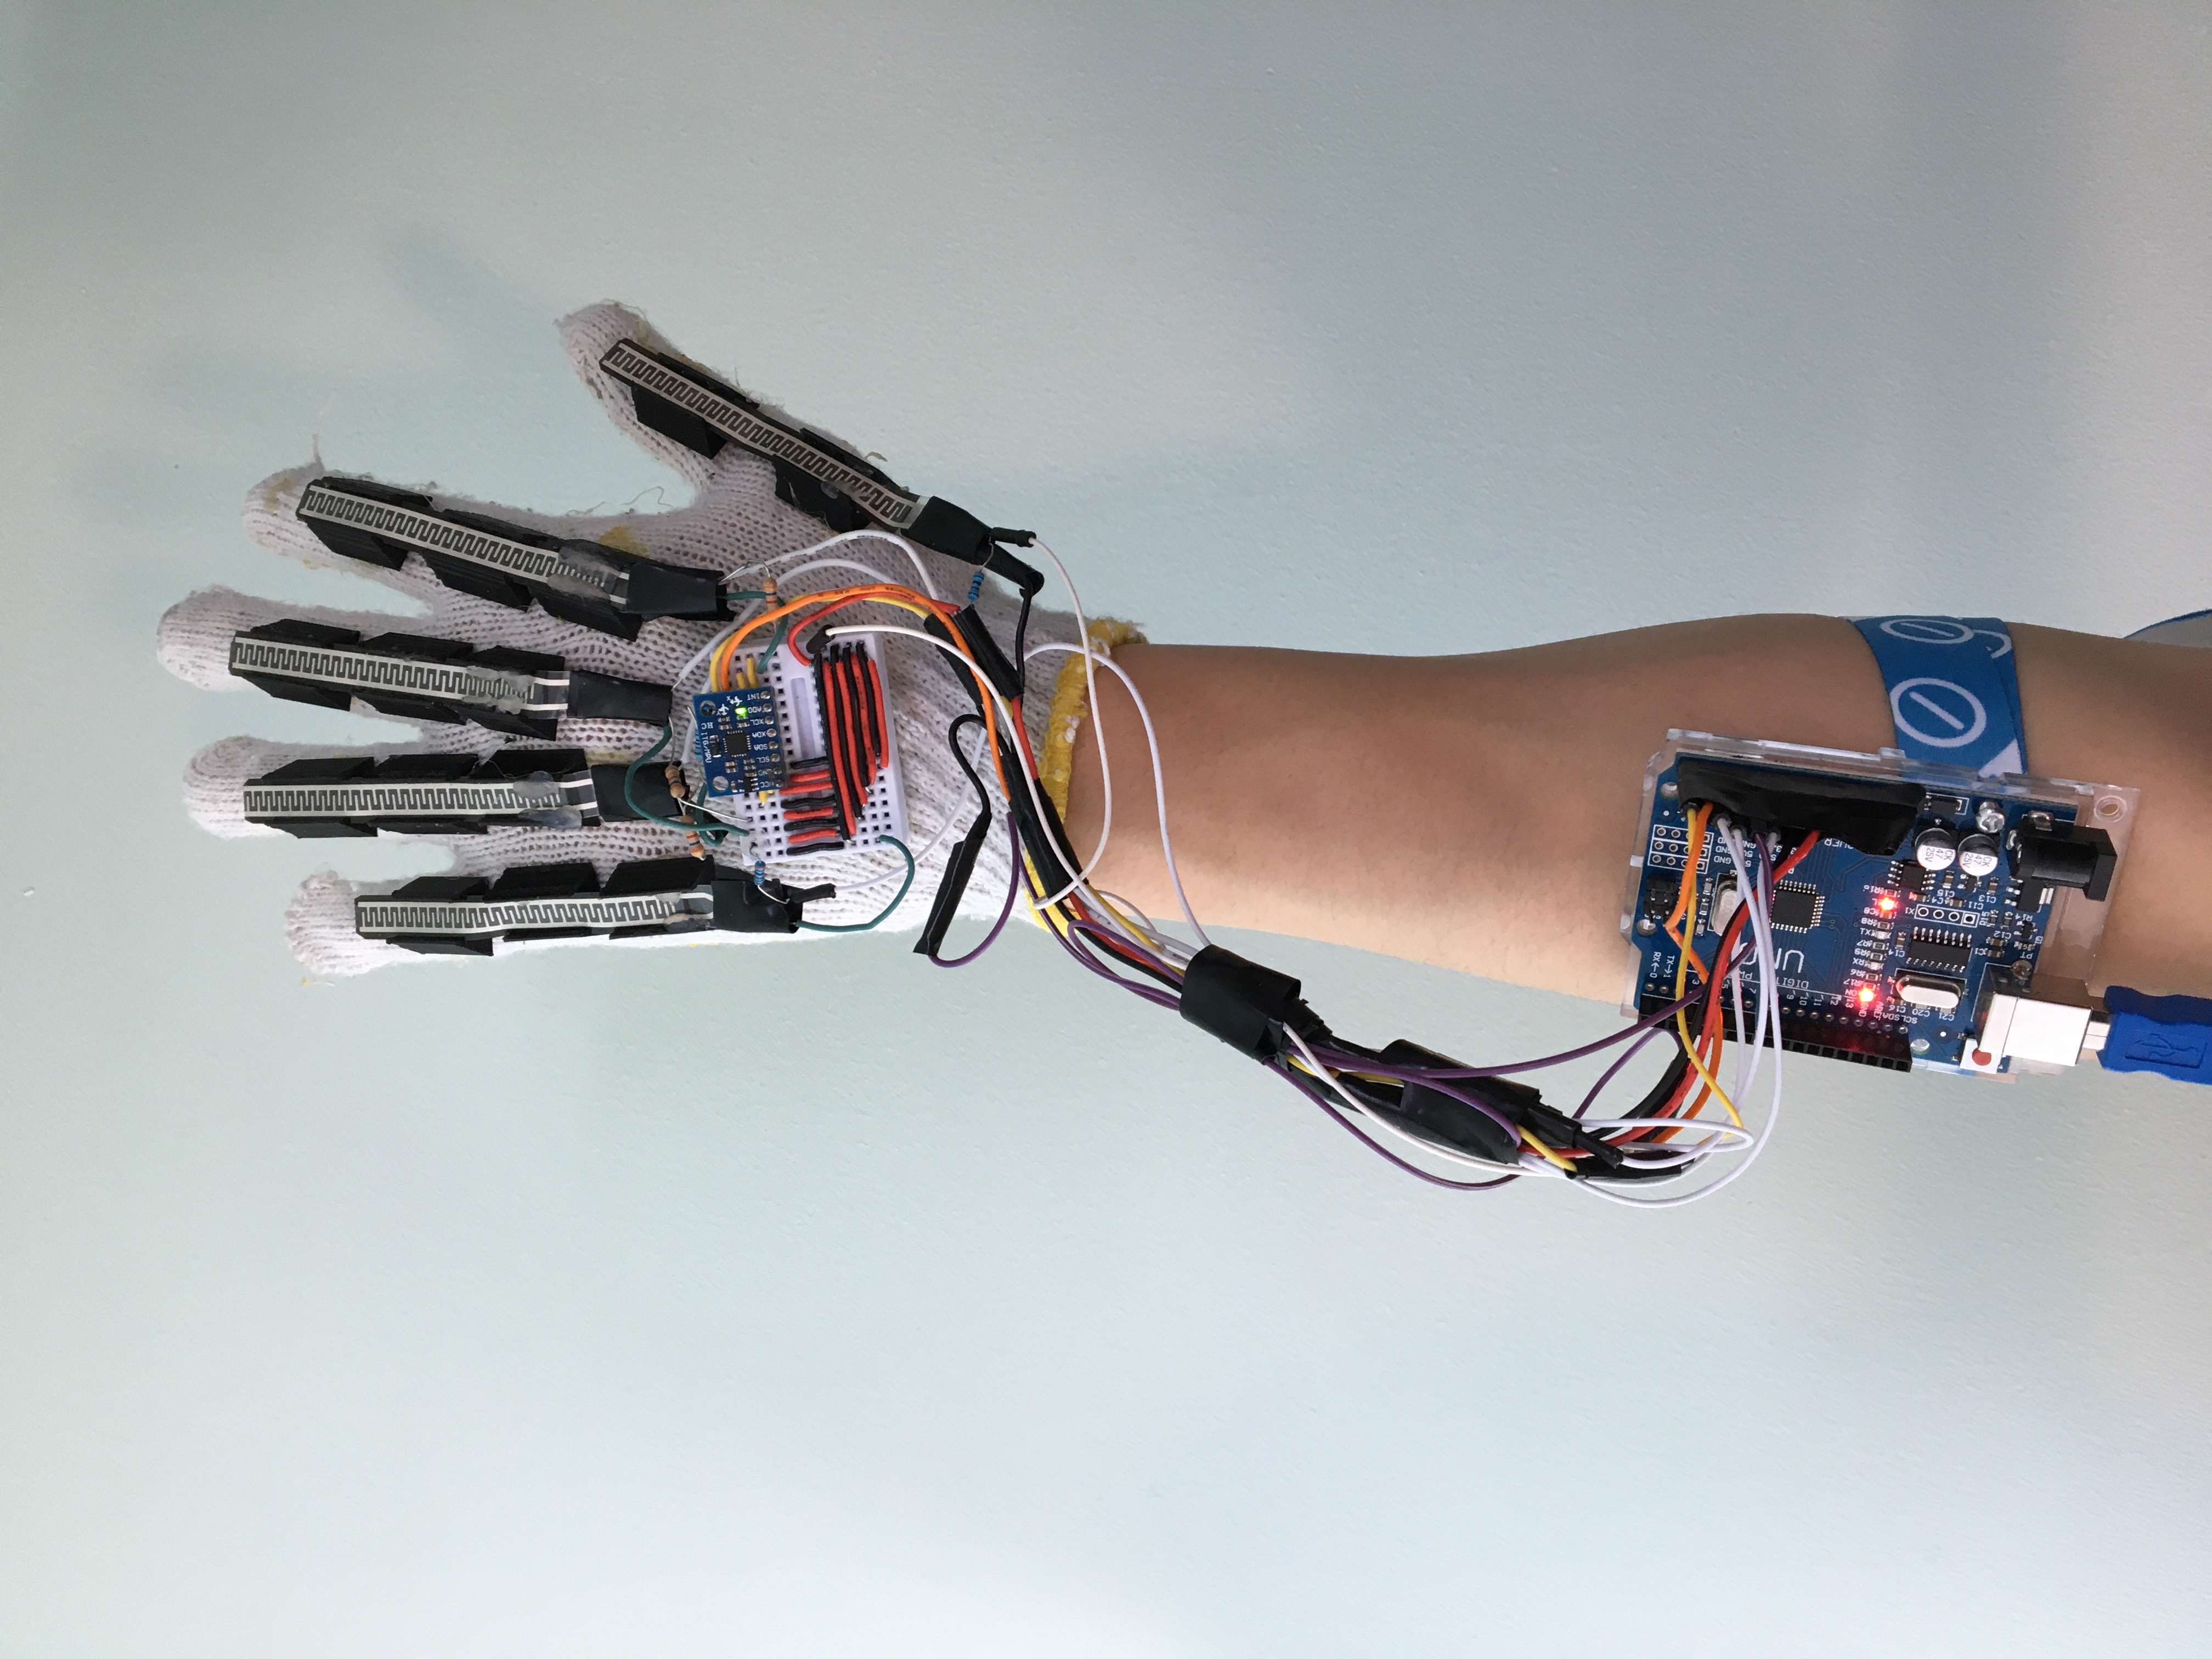
Helping Hand
Helping Hand is a smart glove that uses IMU and flex sensor data to track the user's hand movement and position, and perform real-time gesture recognition to monitor the user's hand mobility. The sensory data is passed into a machine learning model created with TensorFlow and Python to classify the hand gestures in real time.
The flex sensors were mounted on the glove using custom-designed 3D printed holders, and the IMU and flex sensors were wired to an Arduino Uno to collect all the sensory data and pass it onto the machine learning model on the computer via a USB cable. The time-series sensor data from each of the different hand gestures were processed in Python to create datasets to train and validate the TensorFlow model. The model was able to classify hand gestures in real time with an accuracy of 92%, and the user is able to use our program to perform exercises and track their hand mobility through a simple GUI made in Python.
Helping Hand was built together with Shafinul Haque, Jonathan D'Souza, and Matthew Fernandes, and it won 3rd place overall at MakeUofT 2021!
Gesture-Recognition Glove
Python, TensorFlow, Arduino, C/C++
FIRST ROBOTICS TEAM 4015
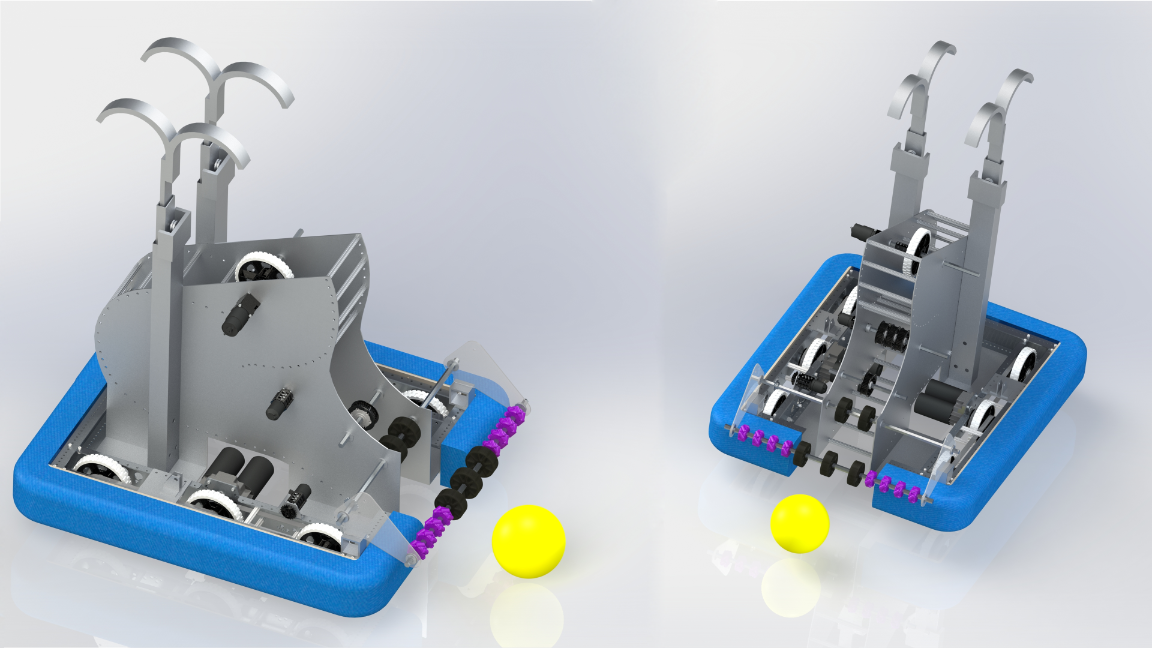
In 2020, alongside 20+ students from the St. Joseph Secondary School Robotics Team, we designed and built a 120-lb robot for the Infinite Recharge FIRST Robotics Competition.
The Design Process consisted of these 3 main stages:
- Designing and Prototyping
- Machining and Assembly
- Programming and Testing
Design
The major subsystems that we decided to focus on for the competition were:
- Intake: To intake the balls from the floor into the robot
- Conveyor: To receive the balls from the intake system and transfer them to the shooter
- Shooter: To shoot the balls at the desired angle to hit the target
- Climber: To pull the robot up off the ground onto a metal bar at the end of the game
Using SolidEdge CAD software, I designed the pneumatically actuated active intake subsystem (after a lot of physical prototyping and testing), which used pneumatic cylinders to extend the intake roller outside of the perimeter of the robot, which had 3D printed mecanum wheels along its shaft to funnel the balls into our robot to be conveyed one by one to the shooter.
Once the subsystems were all designed and assembled in CAD, we machined the parts and assembled the main structure of our robot and connected the electrical components.
Software
Once the robot and all the electrical components were connected, as the Programming Lead, I began to develop the software in Java to control and connect all the subsystems that would eventually enable the robot to efficiently score points under both teleoperated (joystick) and autonomous control.
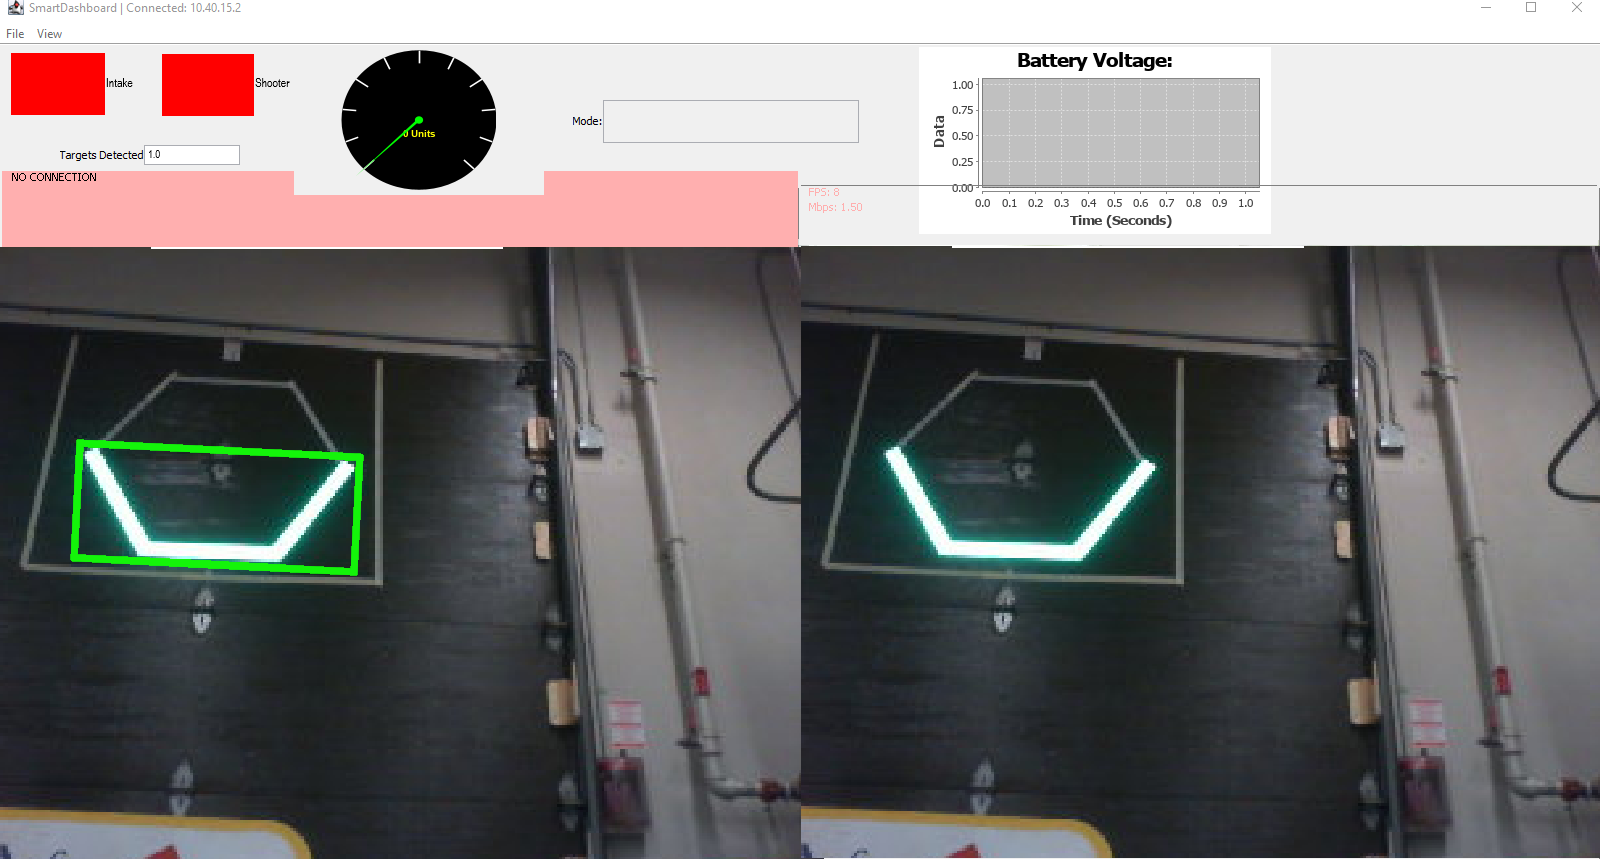
One of the challenges I wanted to tackle this year was to use vision processing to enable our robot to automatically align itself with the target, saving precious seconds and effort that would have been needed if drivers were to do it manually. The method used a camera mounted on the front of the robot, with a bright LED ring around it, to illuminate the retroreflective tape around the target and easily identify it in the images taken by the camera. The images were processed frame-by-frame through a custom-tuned OpenCV pipeline to extract the location and size of the target on the screen.
Once the size and location data were gathered, the robot would calculate its position relative to the target, and automatically adjust its position to keep the target at the center of its screen and at an optimal distance, using a control loop. The drivers were able to toggle the robot’s auto-alignment feature using the controllers, whenever they wanted to shoot at the target, which helped to reduce our cycle times, and increase our scoring chances.
The code for our first (and sadly final) 2020 regular season competition can be found on GitHub.
Team 4015: Finalists at the 2020 Ontario District Georgian College event, and recipients of the Autonomous Award sponsored by Ford.
Despite the season being cut short due to COVID-19, I’m extremely proud of what our team has accomplished, by making 2020 the most successful season in the team’s history. Through this experience, I was able to challenge myself, solve problem, and learn so many new skills, that will help me succeed in the future.
FIRST Robotics Team 4015
Java, Vision Processing, SolidEdge Modeling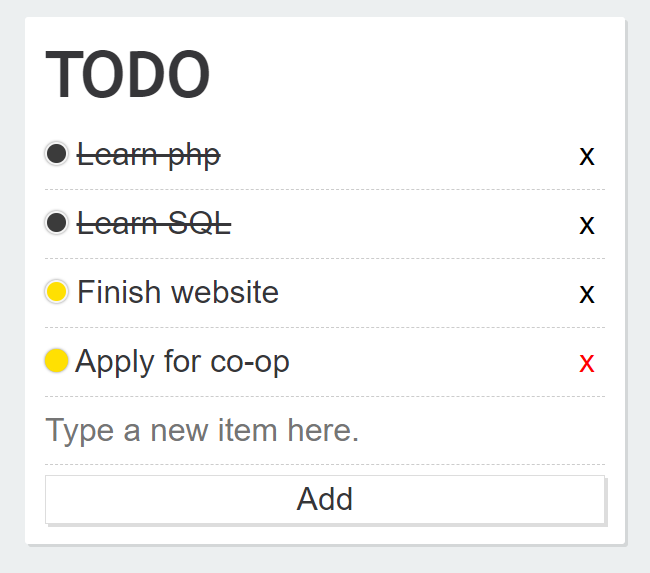
TO-DO LIST
To-do list application created using HTML and CSS for frontend, and PHP with MySQL database for backend.
The user has the ability to add items to the list, mark them as completed, and delete them from the list altogether, with all these changes being processed in PHP to trigger specific MySQL commands to make the appropriate changes inside the SQL database.
SQL database managed using MySQL:

To-do list database
HTML, CSS, PHP, MySQL
Face the Police
Facial recognition Python application that automatically detects and identifies subjects on camera to help first responders mitigate risk and make educated decisions before acting. The application uses the facial_recognition API to match the subject's facial features to a locally stored database of images and infomation about them, and tracks their movements in real time, and displays their information on the screen using a graphical interface.
More information about the inspiration and purpose of the project can be found on our website. Which we designed with HTML and CSS.
This project won 2nd place and the best domain name from Domain.com award at HacktheHammer 2018.
Face the Police
Python, OpenCV, API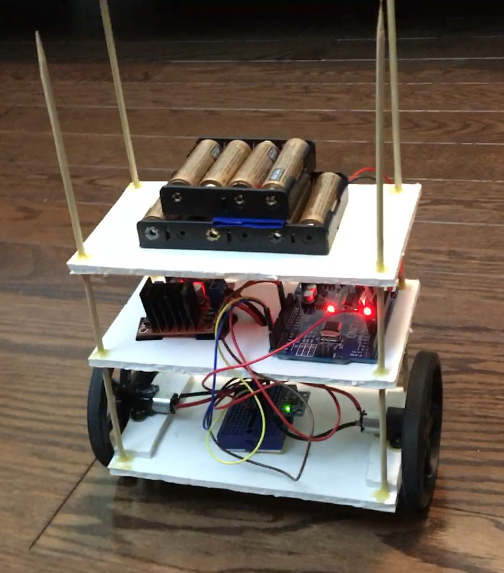
Self-Balancing Robot
A two-wheeled robot that is capable of self-balancing using readings from a MPU6050 inertial measurement unit (IMU), which is connected to the Arduino via I2C libraries. The two brushed DC gearmotors are driven by the L298N dual H-bridge connected to the Arduino. A PID control loop was used to control the motors based off of the readings from the sensor, to help the robot maintain its balance by driving in the direction that it is falling.
The exact PID values still need a bit of tuning, as the robot is able to maintain its balance, but with a lot of small back and fourth vibrations.
The first iteration of the design used a single Memsic 2125 Accelerometer instead of an IMU, which severely limited the data collecting capabilities, and so the robot could not react fast enough to the change in tilt angle and would fall over almost immediately. The second iteration, which used the MPU6050 was also unable to balance itself due to the center of gravity of the robot being too low, closer to the pivot point, which would cause the robot to fall over faster, before the sensor at the top of the robot could react. In the latest iteration, the heavy battery packs are now placed on top, which increases its rotational inertia, and causes it to fall slower. Additionally, the sensor is placed lower, and being closer to the axis of rotation, it allows the sensor to get more accurate readings and respond faster than before. Both these changes dramatically helped the robot be more stable, and easier to self-balance.
Self-Balancing Robot
C/C++, Arduino, MPU6050, PID Control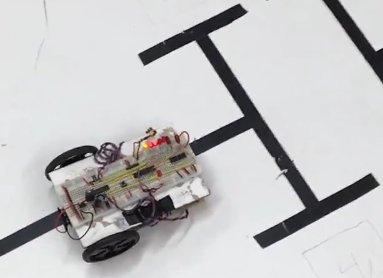
Line Following Robot
A line following robot which uses two infrared (IR) sensors to detect whether the robot has reached a line on either sides, and will turn the motors accordingly to steer the robot away from that side where it is touching the line, so that it may maintain its course on the line. The two DC gearmotors are driven by an H-bridge chip, which is controlled by a PIC18F2550 microcontroller programmed using the PICkit 2 in C.
The robot is able to detect when it has reached a corner by sensing if both IR sensors have been triggered simultaneously, and this logic could be extended to allow the robot to read a barcode consisting of a number of perpendicular lines at the end of the track.
In this demo, the robot starts in a square in one corner, and when the button is pressed, it travels its way to the barcode on the opposite corner of the field, following the pre-designated lines around the edge. Then the robot reads the number of thinner lines in between the two thick lines and indicates it by lighting up the same number of LEDs. The robot will then travel to 1 out of the 4 drop-off locations in the center of the field corresponding to the number of lines read, to drop off a virtual package (represented by the Yellow LED being turned off). Finally, the robot will return to the starting square, and end the sequence.
Line Following Robot
C, Integrated Circuits (PICkit 2), IR Sensor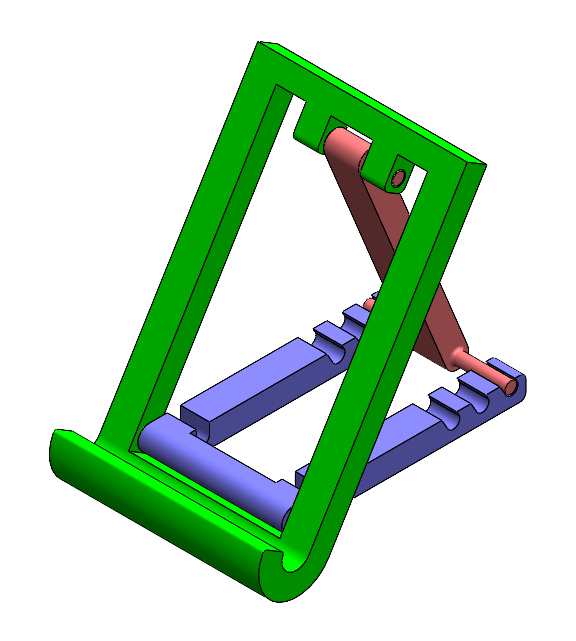
Phone Stand
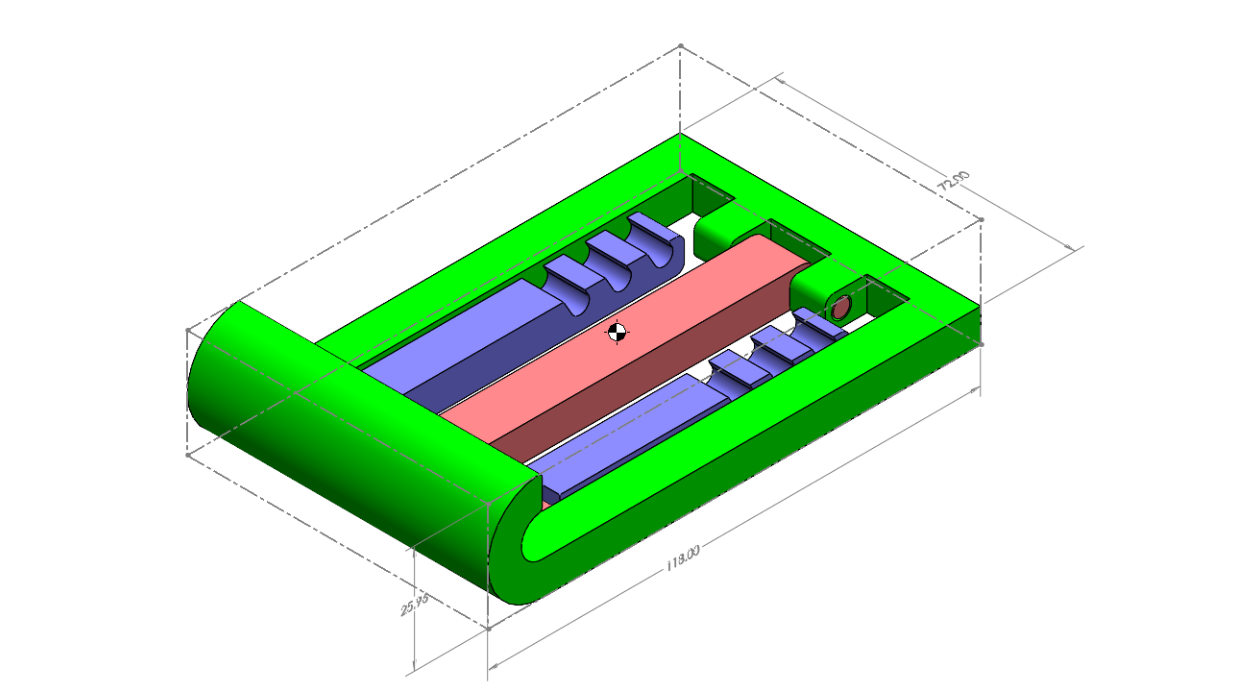
Using SolidWorks, I designed a foldable phone stand capable of three different upright positions for adjustability, and suitable for phones less than 10mm in thickness, to be 3D printed. When a phone is placed on the stand, its center of mass is located at the center of the stand, to ensure that the stand remains upright.
The design uses three separate parts linked together by two hinges, to allow for the stand to be easily folded for transport. Additionally, the stand requires no assembly, as it is 3D printed in its folded position all as one assembly, due to the interlocking hinges.
Phone Stand
SolidWorks Modeling and DimensioningContact Me





 Email me at danielye4@gmail.com
 Follow me on GitHub
 Follow me on Devpost
 Connect on LinkedIn